> For the complete documentation index, see [llms.txt](https://docs.customerglu.com/llms.txt). Markdown versions of documentation pages are available by appending `.md` to page URLs; this page is available as [Markdown](https://docs.customerglu.com/third-party-integrations/send-user-events.md).
# Source
Various methods of sending user events to CustomerGlu for completion of activity based campaigns
## Sending Events directly from Server
The following API can be used to send user events directly from your server
## Sending events from server to server
`POST` `https://events.customerglu.com/server/v4`
Sending events using server side integration
#### Headers
| Name | Type | Description |
| ---------------------------------------------- | ------ | ----------------------------------------- |
| X-API-KEY\* | string | \ |
| Content-type\* | string | application/json |
#### Request Body
| Name | Type | Description |
| --------------------------------------------------- | ------ | ------------------------------------------------------------------------------- |
| event\_id\* | string | Unique identifier for the event |
| event\_properties\* | object | Key-value pair of event properties (send empty object in case of no properties) |
| event\_name\* | string | Name of the event |
| timestamp\* | string | ISO Format Timestamp for the event (UTC is recommended) |
| user\_id\* | string | UserId of the user, registered with CG, performing the activity |
{% tabs %}
{% tab title="200 " %}
```
```
{% endtab %}
{% endtabs %}
{% hint style="warning" %}
To guarantee quick response times, request validations are done at a later stage in the pipeline.
Please ensure that all the required fields (marked with '\*') are present in the request payload. Failure to do the same might result in the events not being processed inspite of a success response.
{% endhint %}
## Segment
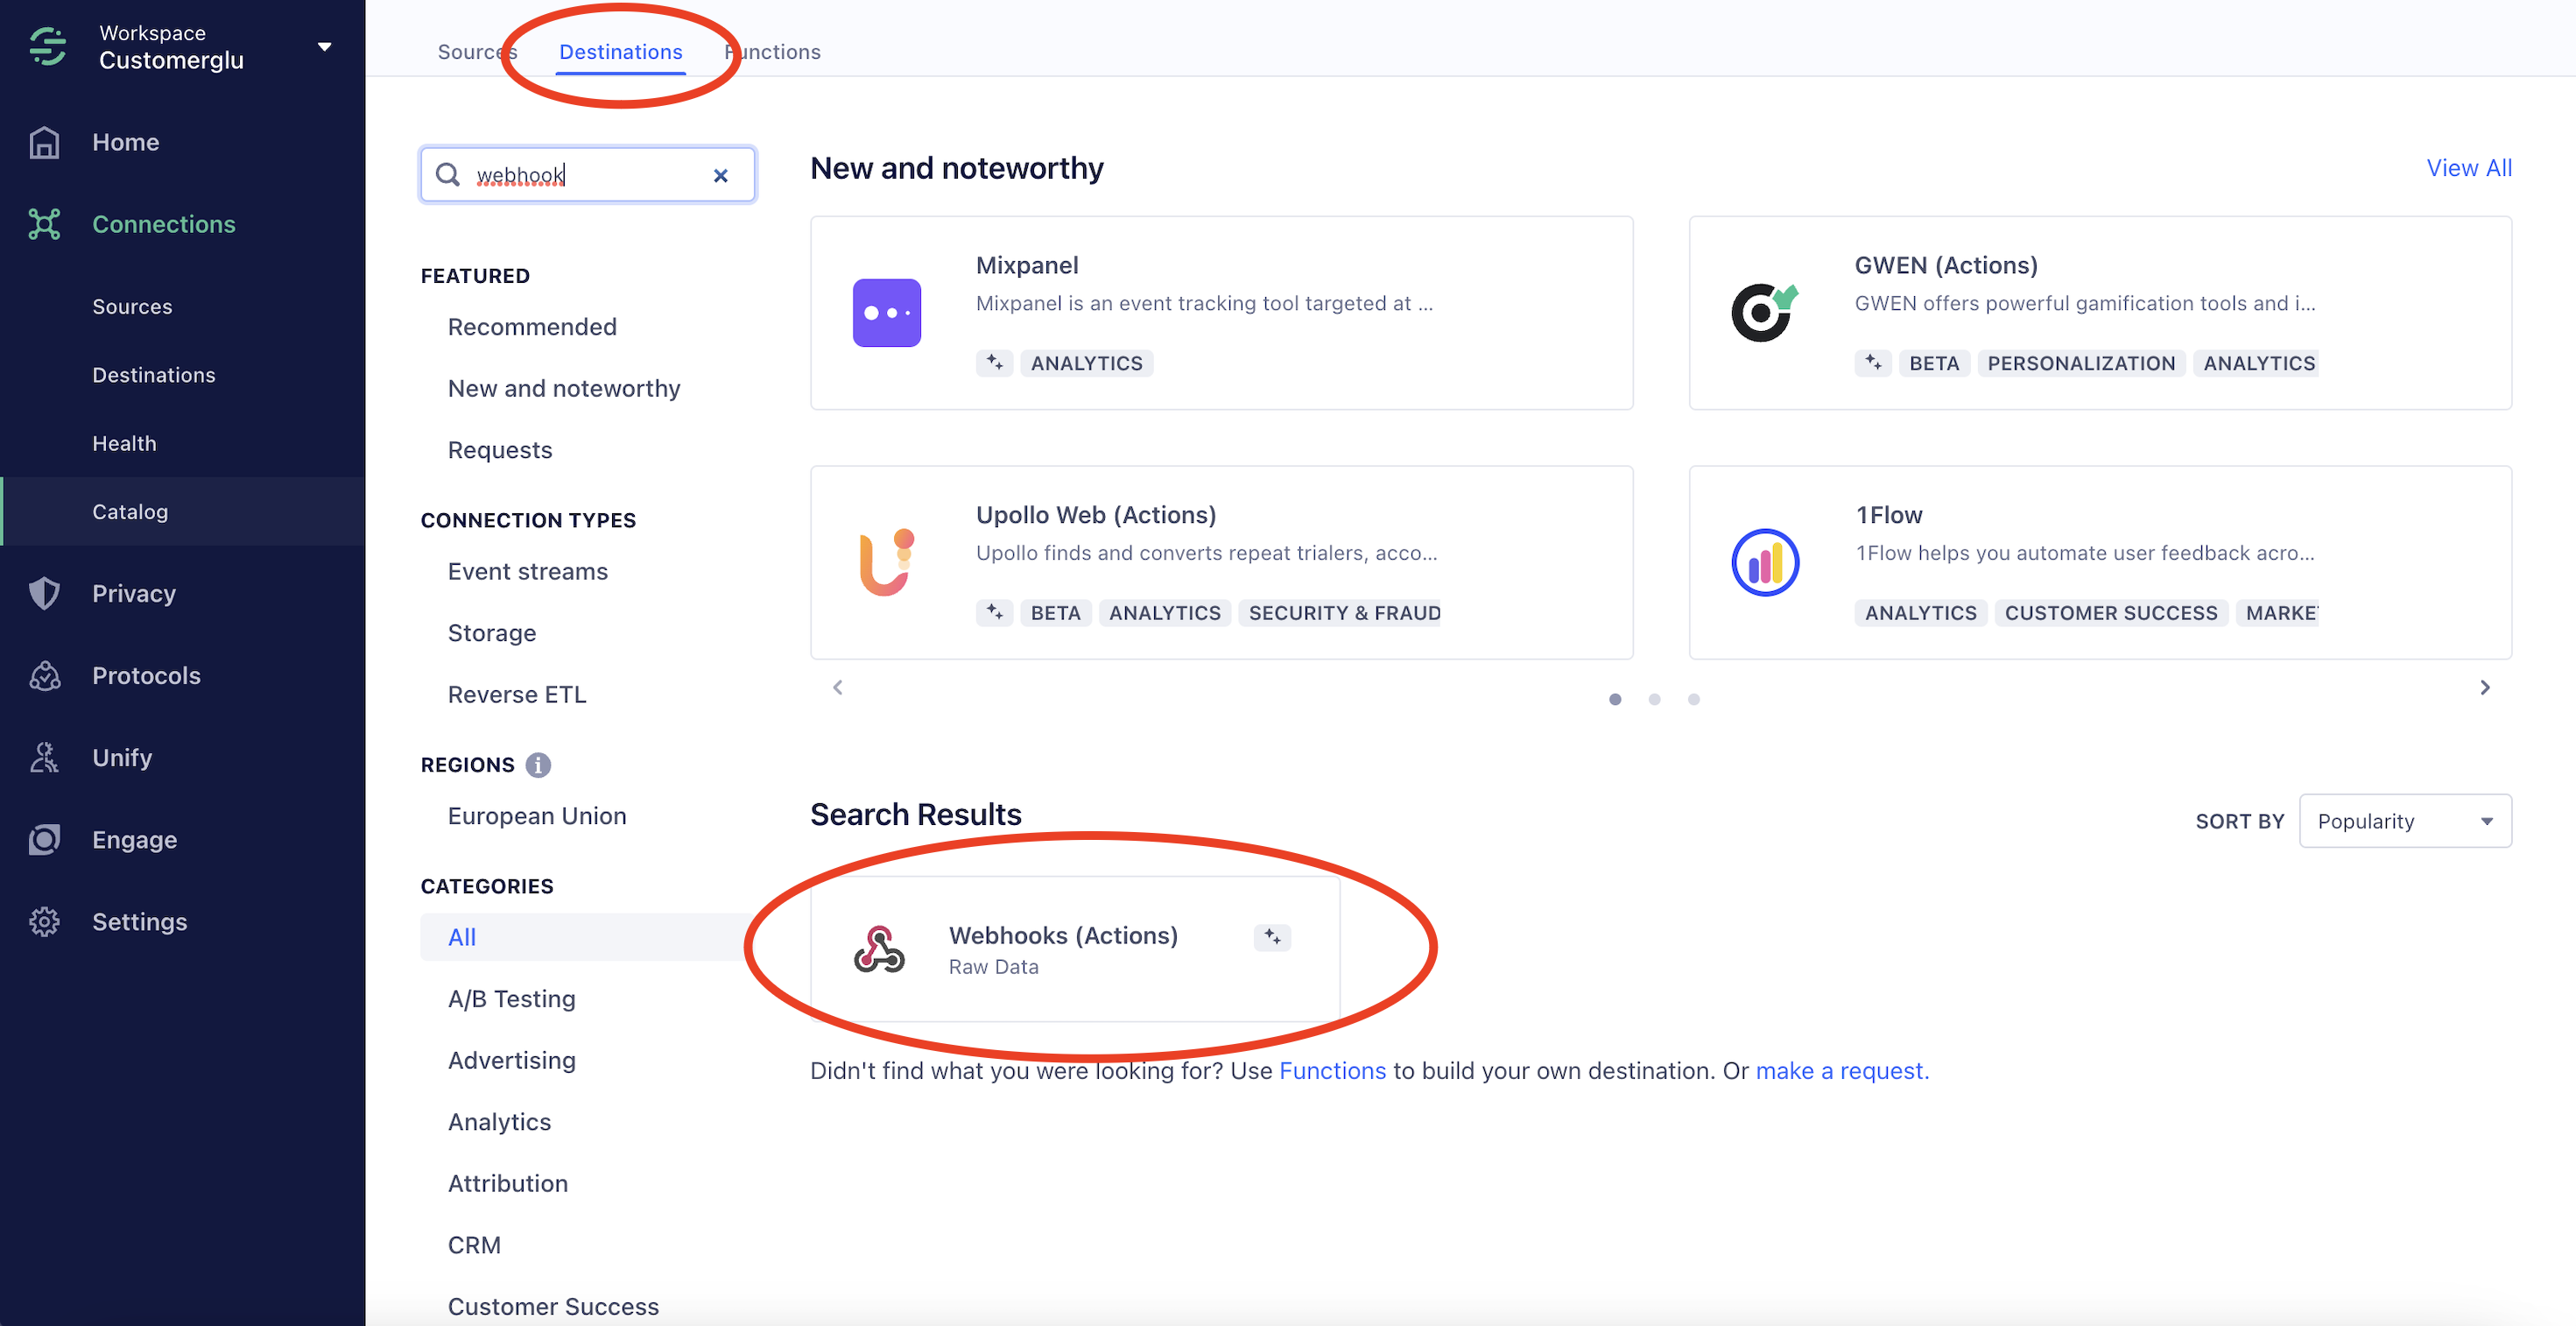
To send events from segment, set up a webhook for your destination.
**Create a new Destination of type "Webhook"**
**Configure Webhook (Actions)**
**Select the source of data to be sent to CustomerGlu**
**Set up a name for the webhook**
**Add mapping to the Webhook**
**Select which events to Forward to CustomerGlu**
Choose only the events which are required for Segmentation and completion of Activities in CustomerGlu campaigns.
#### Add test event
Load test event from source
**Configure the webhook request mapping**
* Add the webhook endpoint
* Select batch size as 1
* Add your API Key in the headers with the key name "X-API-KEY"
* Save the webhook
## Sending events from moengage
`POST` `https://events.customerglu.com/segment/v4`
#### Headers
| Name | Type | Description |
| ------------------------------------------- | ------ | -------------------------------- |
| X-API-KEY\* | String | WriteKey provided by customerGlu |
{% tabs %}
{% tab title="200 " %}
```
```
{% endtab %}
{% endtabs %}
## Moengage
In order to start sending events from MoEngage to CustomerGlu, MoEngage streams can be used.\
[MoEngage documentation](https://help.moengage.com/hc/en-us/articles/360045896572-MoEngage-Streams#enabling-streams-for-your-account-0-2)
## Sending events from moengage
`POST` `https://stream.customerglu.com/v3/moengage`
#### Headers
| Name | Type | Description |
| ------------------------------------------- | ------ | -------------------------------- |
| X-API-KEY\* | String | WriteKey provided by customerGlu |
{% tabs %}
{% tab title="200 " %}
```
```
{% endtab %}
{% endtabs %}
## Amplitude
You can set up a webhook on Amplitude to forward specific user events to CustomerGlu.
[Check out docs](https://amplitude.com/docs/data/destination-catalog/webhooks)
### Sending Events from Amplitude
**Headers**
| Name | Type | Description |
| ------------------------------------------- | ------ | -------------------------------- |
| X-API-KEY\* | String | WriteKey provided by customerGlu |
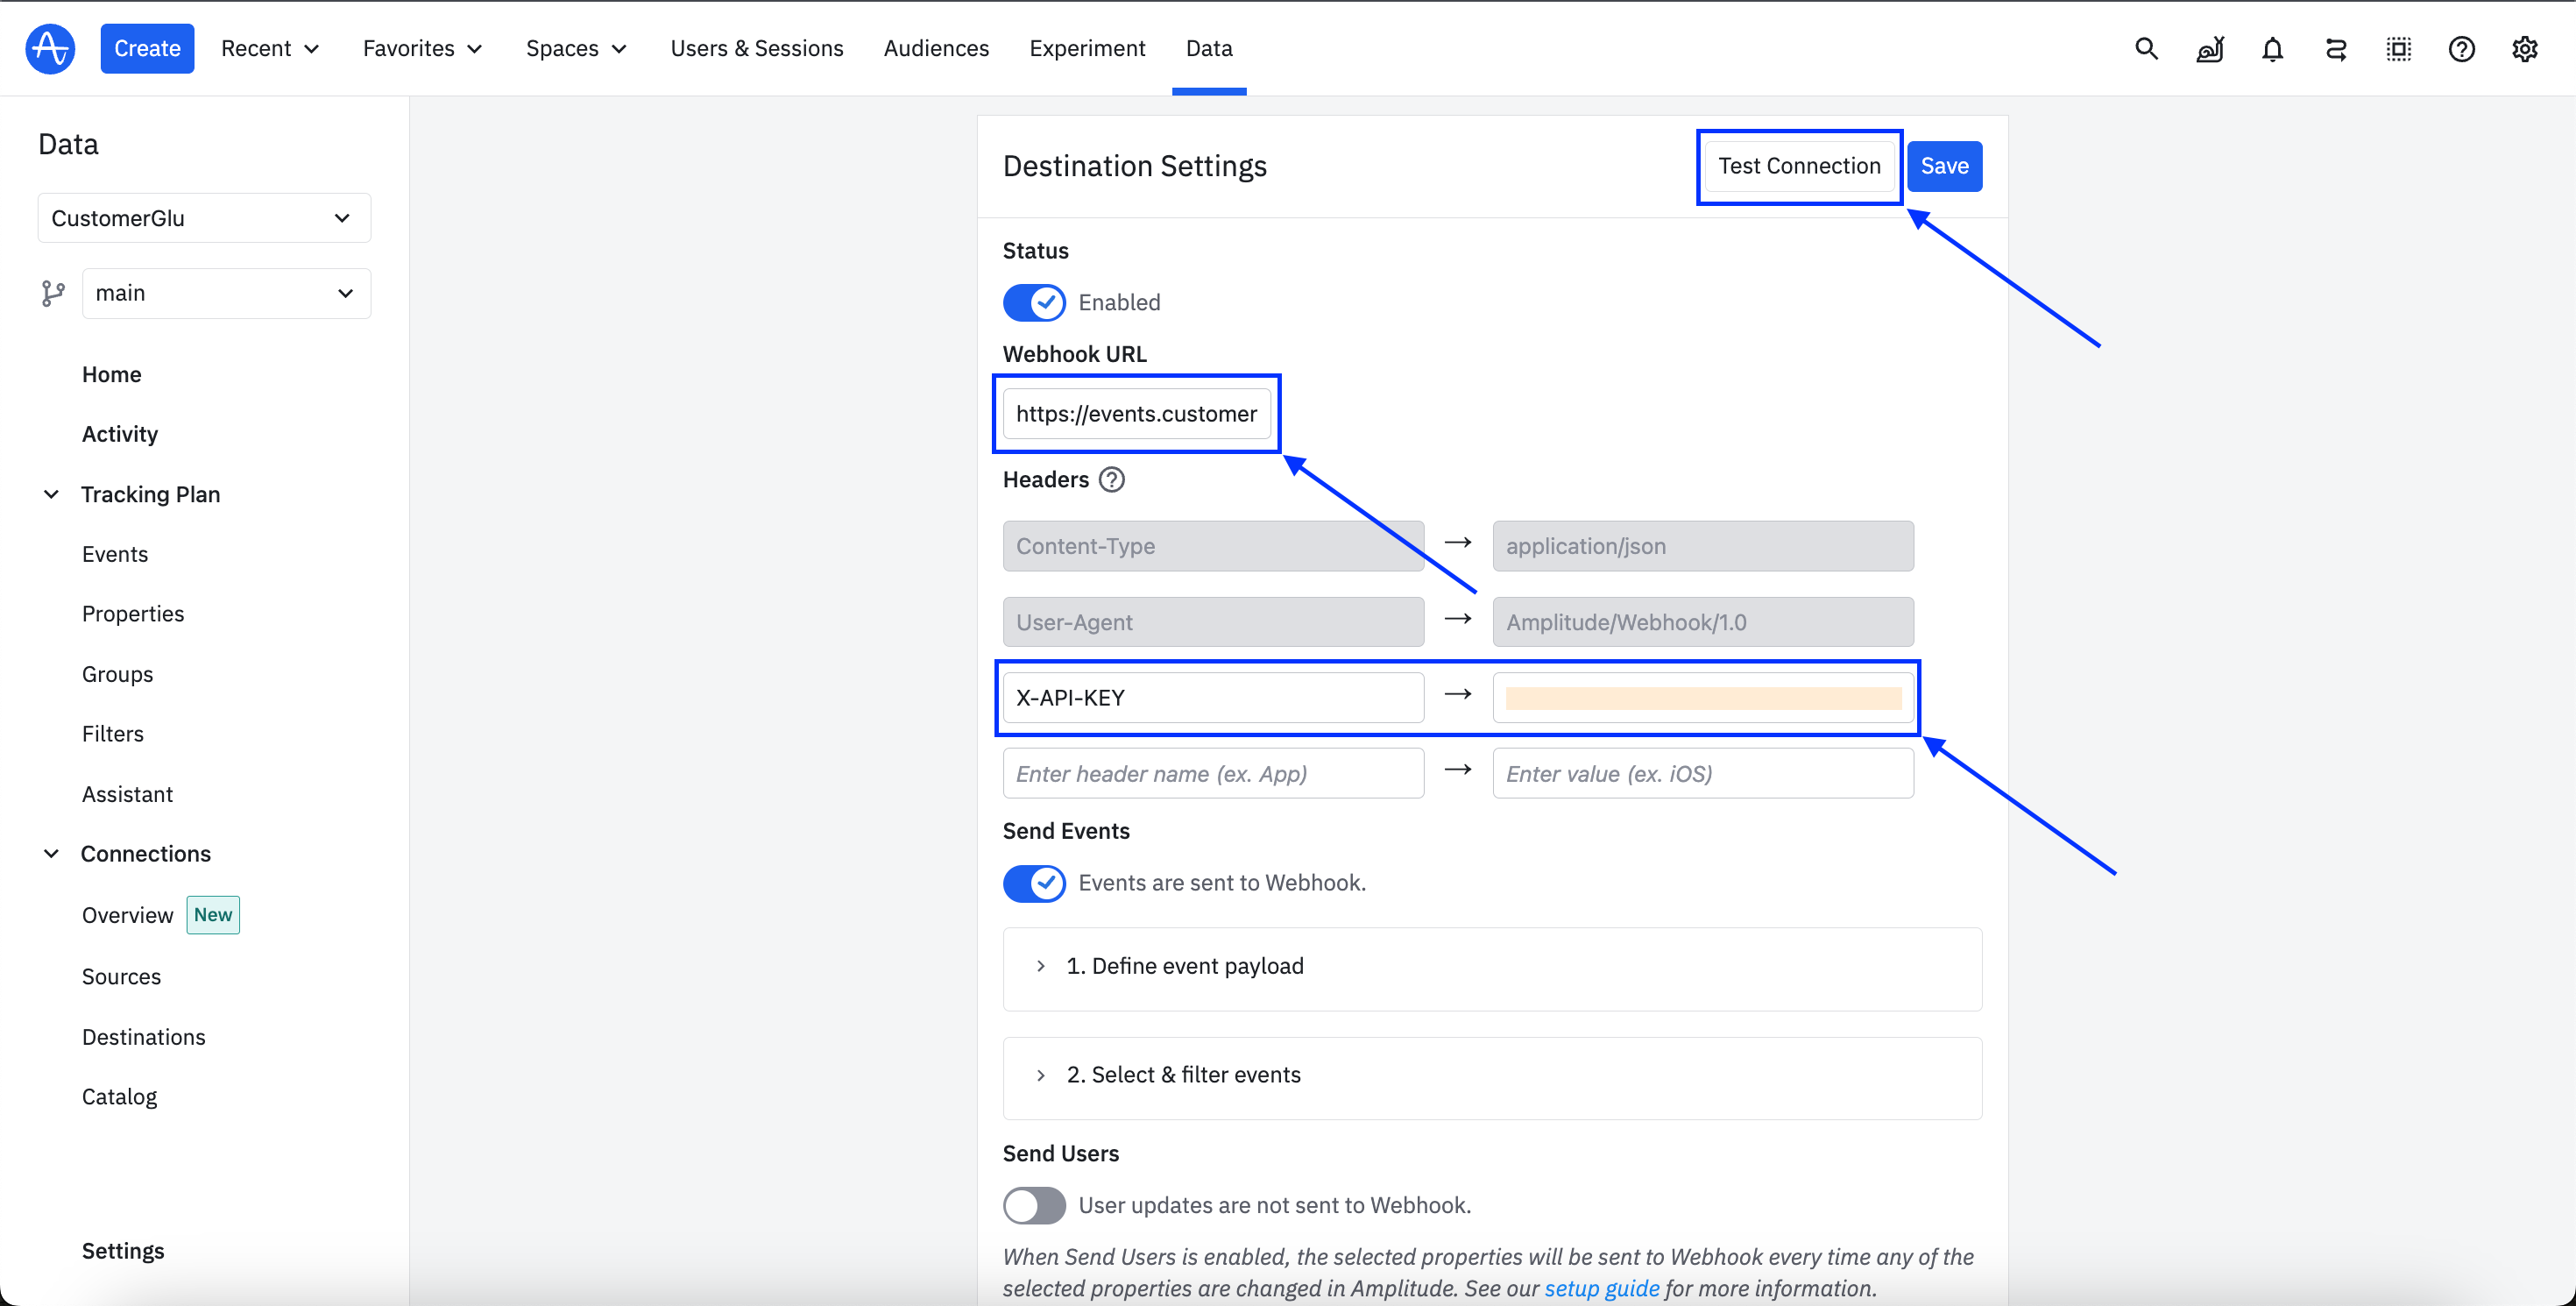
### Set Up and Activate Your Webhook Integration
1. Login to your Amplitude account and navigate to **Data.**
2. Navigate to **Destinations** and click on **Add Destination**
3. Search for **Webhook** and click on **Webhook**.
4. Please provide a relevant **Sync Name**.
5. Log in to **CustomerGlu**, click on the **Dev Console**.
6. Click on **Amplitude** Integration.
7. Here you will find your **Webhook URL** and **headers**.
8. Enter your **Webhook URL** and **headers**, then click on Test **Connection**.
9. Click on **Send Test Events** and you will see a confirmation message. Then click on **Finish** and save your destination.
## CleverTap
You can set up a webhook on CleverTap to forward specific user events to CustomerGlu.
**Configure CustomerGlu Endpoint as a Webhook on Clevertap**
[Check out docs](https://docs.clevertap.com/docs/setup-webhooks)
## Sending events from clevertap
`POST` `https://events.customerglu.com/clevertap/v4`
#### Headers
| Name | Type | Description |
| ------------------------------------------- | ------ | -------------------------------- |
| X-API-KEY\* | String | WriteKey provided by customerGlu |
{% tabs %}
{% tab title="200 " %}
{% endtab %}
{% endtabs %}
#### **Create and Launch a Webhook Campaign**
[Check out Docs](https://docs.clevertap.com/docs/create-message-webhook#broadcast-message)
1. Create a new Webhook Campaign
2. Select "Live Behavior" as the qualification Criteria
3. Select the already configured CustomerGlu Webhook Endpoint
4. Select the events that need to be passed to CustomerGlu
5. Configure the event names and properties that CustomerGlu will receive and expect for any segmentation/campaign related settings. [Liquid Tags](https://docs.clevertap.com/docs/liquid-tags) can be used for configuring the values.
{% hint style="info" %}
Note: Please make sure that the resultant payload can be parsed as a valid JSON.
{% endhint %}
## Webengage
**Configure CustomerGlu Endpoint as a Webhook on Webengage**
Webengage allows setting up a webhook url, and forwards all the events to the same.\
The following url can be set up as the Webhook endpoint on your Webengage Dashboard.
[Check out Docs](https://docs.webengage.com/docs/webhook-configuration)
## Sending events from webengage
`POST` `https://events.customerglu.com/webengage/v4`
{% tabs %}
{% tab title="200 " %}
{% endtab %}
{% endtabs %}
\
In order to enable webhooks from Webengage, the following inputs from your WebEngage Dashboard need to be added in the Integrations Page of CustomerGlu dashboard:
| Name | Description |
| ----------- | ----------------------------------------------------------------------------------------------------- |
| licenseCode | Your WebEngage account license code |
| Secret | MD5 Hex of the combination of your WebEngage license code and the Webhook Secret Key separated by `:` |
[Check out docs for getting the required credentials](https://docs.webengage.com/docs/webhooks#section-request-verification)
MD5 Hex of `:` can be generated [here](https://codebeautify.org/md5-hash-generator)